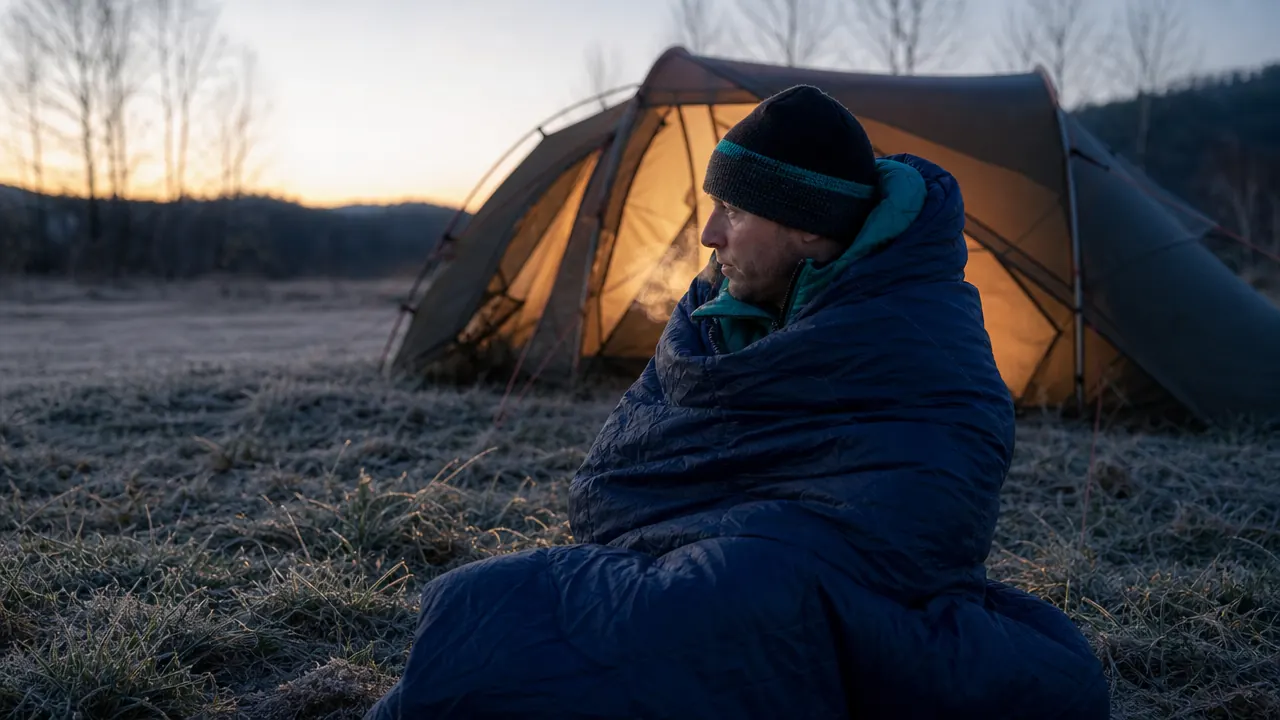
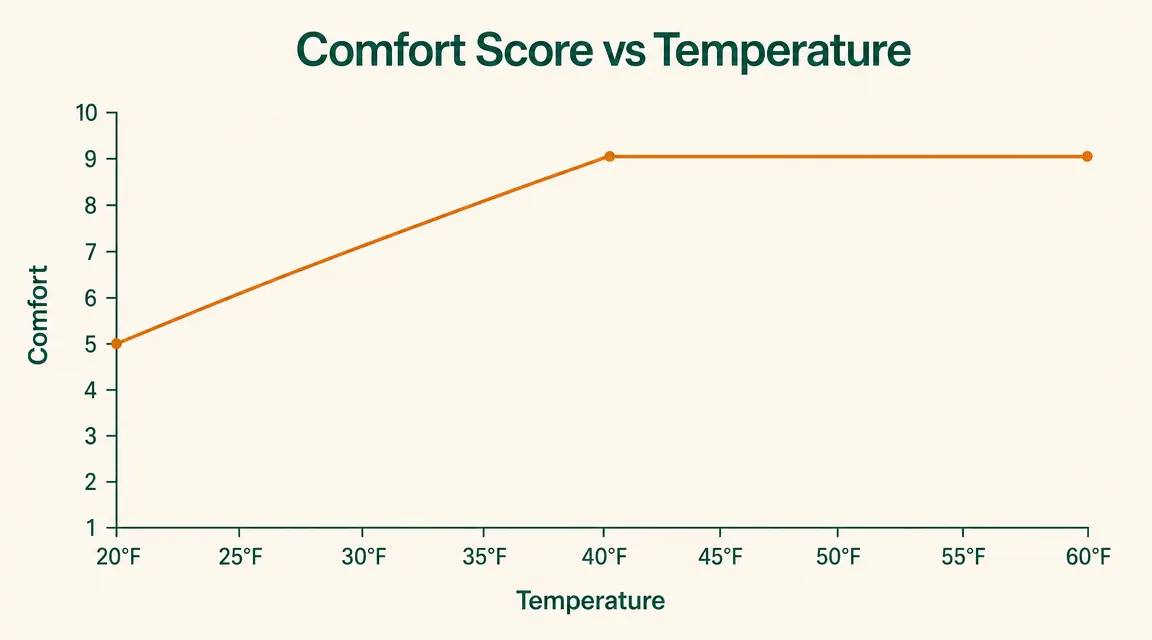
The night I learned this lesson I was at 5,400 feet in the Smokies in late October, inside a bag rated to 35 degrees, shivering at 2 a.m. with the thermometer sitting at 38. The bag was not defective. I had just skipped four steps that I now never skip. A temperature rating tells you the floor where a sleeping bag stops most adults from hypothermia, not the temperature where you will sleep comfortably. Below 40 degrees, comfort depends almost entirely on what you do before you zip up.
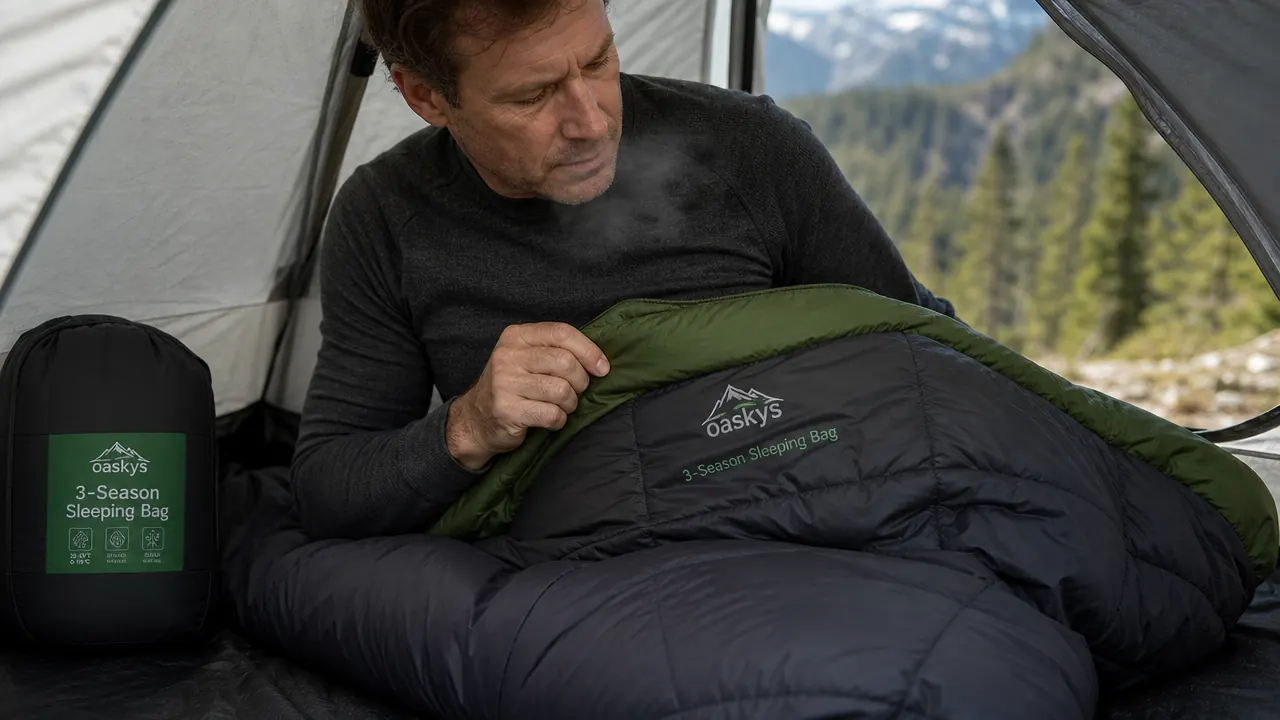
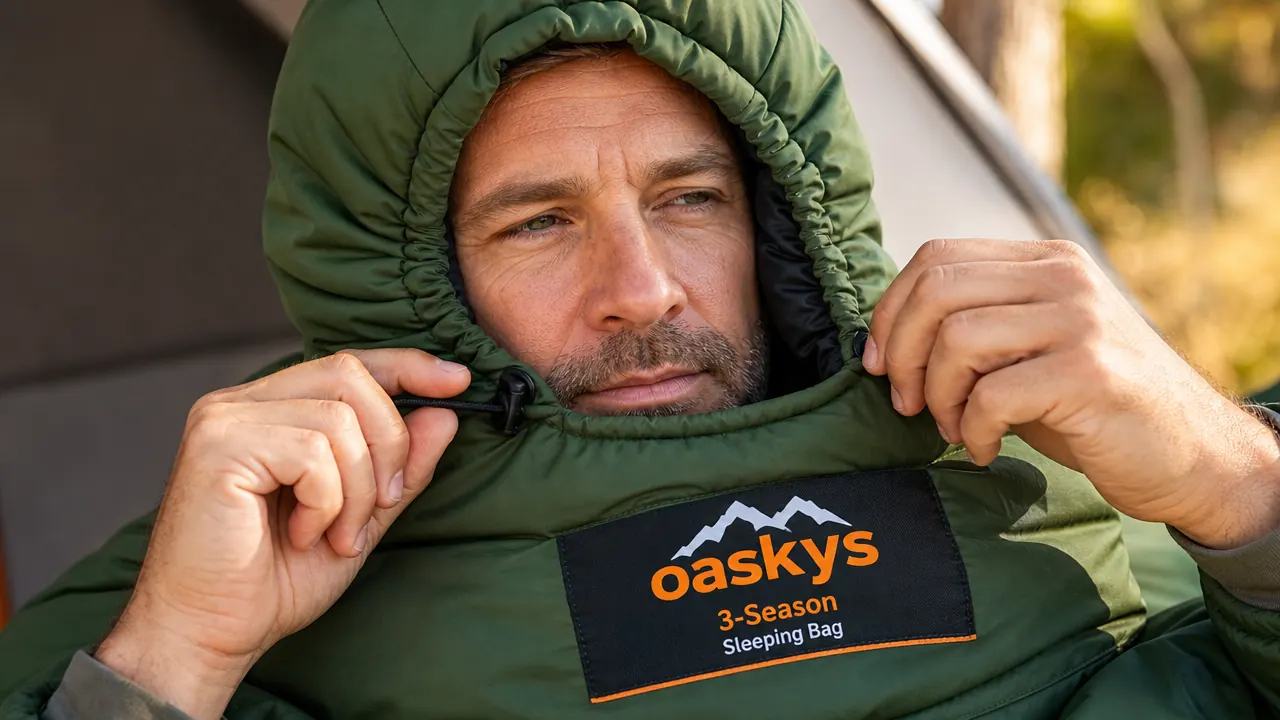
The oaskys three-season sleeping bag is the tool I reach for on most trips in this temperature range. It is rated to 35 degrees, weighs 3.3 lbs, and packs down to roughly the size of a rugby ball. At current pricing it is one of the better-value bags on Amazon with over 24,000 reviews and a 4.5-star average. But even a good bag gets cold if you skip the prep. These six steps work whether you are using the oaskys or any other bag rated between 30 and 45 degrees.
Your sleeping bag is only as warm as your setup. Start with the right bag.
The oaskys 3-season sleeping bag is rated to 35 degrees, weighs 3.3 lbs, and packs to the size of a rugby ball. Over 24,000 campers use it as their primary three-season bag.
Amazon Check Today's Price on Amazon →Step 1: Sleep on an Insulated Pad, Not the Ground
Ground cold is the fastest route to a bad night. Soil below 40 degrees acts as a heat sink and pulls warmth directly through the compressed insulation on the bottom of your sleeping bag. No amount of fill rating helps here because compressed down or synthetic fill has almost no insulating value. The fix is R-value, not a warmer bag. For three-season camping down to 35 degrees, you want a sleeping pad rated at R-3 or higher. A standard 0.25-inch foam closed-cell pad runs about R-1.5 and is not enough on cold ground. A 1-inch self-inflating pad lands around R-3.5 to R-4 and makes a measurable difference. If you already own a thin foam pad, doubling it up with a cheap reflective foam underneath adds roughly R-1 at almost no weight penalty.
One test I ran: same bag, same ambient air temp of 38 degrees, two nights back to back. Night one on a thin foam pad. Night two on a 1.5-inch self-inflating pad rated R-3.8. Night two I slept through until 6 a.m. without waking. Night one I was awake at 2 a.m. and pulling on a jacket. Pad R-value is not optional below 40 degrees.
Step 2: Add a Fleece Liner Before You Reach for a Heavier Bag
A fleece sleeping bag liner adds roughly 10 to 15 degrees of warmth to whatever sleeping bag it sits inside. A standard 75-gram polar fleece liner weighs about 12 oz and compresses to roughly the size of a softball. Slide it inside your sleeping bag before you get in and you have effectively converted a 35-degree bag into a 20-25 degree bag for around $20 to $30, without buying a new bag. The liner also keeps the inside of your sleeping bag cleaner, which matters for insulation longevity since body oils degrade fill over time.
Silk liners are lighter and more packable but add only about 5 degrees. Cotton liners are cheap but absorb sweat and stay damp, which works against you. Fleece is the right choice for the 30-45 degree range. Mummy-shaped liners pair best with mummy bags like the oaskys because they do not bunch at the shoulders.
A fleece liner turns a 35-degree sleeping bag into a 22-degree bag for about $25. That math is hard to argue with at the campsite at midnight.
Step 3: Wear Your Base Layers Into the Bag
Your sleeping bag insulates by trapping warm air your body produces. The more heat your body radiates in, the faster that air warms up. Going to bed in a cotton t-shirt and sleep shorts when it is 38 degrees outside means your body is spending the first hour just raising the air temperature inside the bag. Merino wool or synthetic base layers worn into the bag reduce that warm-up time and keep the trapped air warmer longer through the night.
The specific layers I use below 40 degrees: a midweight merino wool long-sleeve top (190 g/m2), merino long underwear bottoms, merino wool socks, and a light wool or fleece beanie. The hat is not optional. Roughly 30 to 40 percent of body heat escapes from an uncovered head. The hood on the oaskys bag cinches down well, but I still wear a hat under it for any night below 38 degrees. Do not wear down jackets or puffy layers into the bag. The compressed insulation cannot loft and you end up with cold spots.
Step 4: Manage Moisture Before You Zip Up
Wet insulation does not insulate. Moisture enters your sleeping bag from two directions: sweat from inside and condensation from outside. The outside problem is solved by venting your tent properly, which we will cover in Step 6. The inside problem is managed by controlling your body temperature before you get into the bag.
The mistake most campers make: hiking back from the fire to the tent with a flushed, sweating core, then climbing straight into the sleeping bag. That moisture soaks into the fill during the night and reduces its loft by morning. The fix is a 5-minute cool-down window. Sit outside the tent, let your core temperature drop slightly, then get in. If you do sweat during the night, partially unzip the bag to vent rather than lying in damp insulation. The oaskys bag has a full-length two-way zipper with a draft tube, which makes venting without fully opening the bag easy to manage in the middle of the night.
Also: avoid eating a large meal right before bed with the expectation that digestion will keep you warm. A small snack with some fats and protein is better. Alcohol drops your core temperature despite feeling warm initially. It is one of the most consistent ways to turn a 38-degree night into a cold one.
Step 5: Pre-Warm Your Sleeping Bag Before You Get In
Climbing into a cold bag and waiting for your body heat to warm it up takes 20 to 40 minutes and that first stretch is genuinely uncomfortable. There are two practical ways to pre-warm a sleeping bag. The first is a hot water bottle. Fill a 1-liter Nalgene with boiling water, cap it tight, and drop it into the foot box of your sleeping bag 15 minutes before bedtime. It warms the bag from the bottom up and stays warm for 3 to 4 hours. Move it to your core if you wake cold during the night.
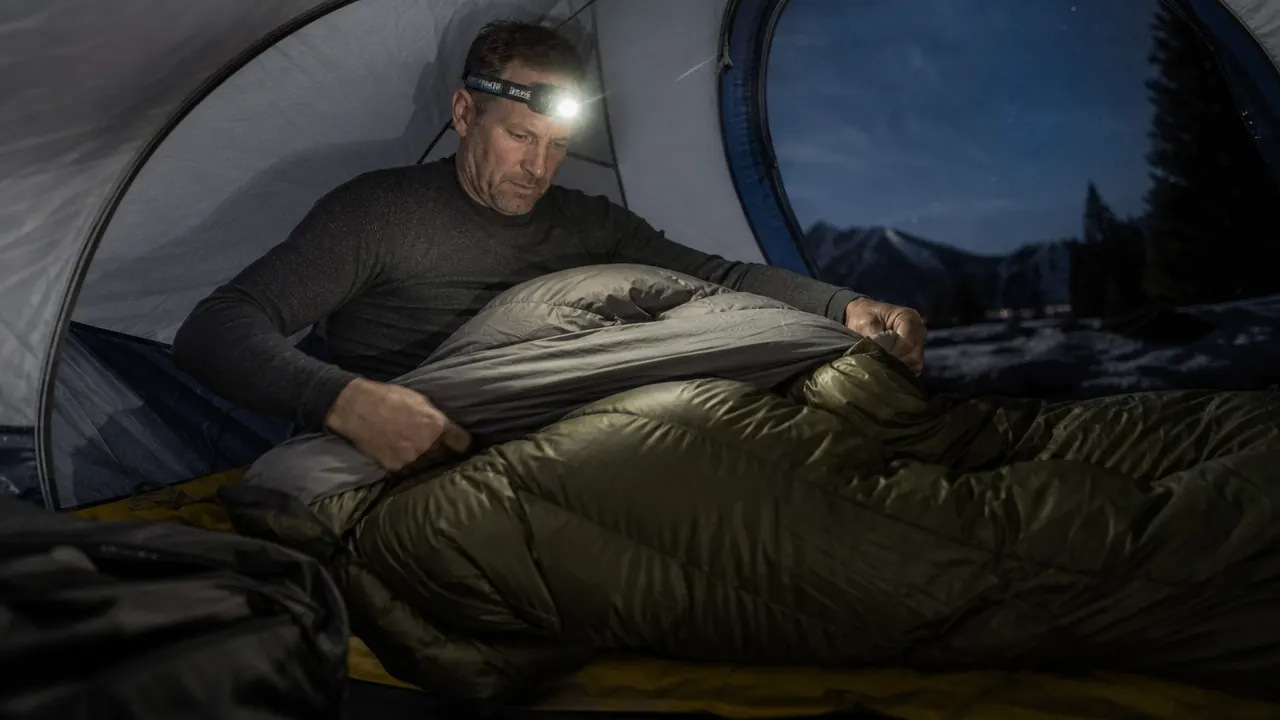
The second method is a hand warmer packet. The air-activated variety rated for 10 hours works well. Slip one into a sock so it does not contact skin directly and place it in the bag 10 minutes before getting in. For the oaskys specifically, there is a small interior pocket near the collar that can hold a hand warmer or phone without it falling to the foot box. Both methods reduce the time between getting in and actually sleeping from 30 minutes down to about 5.
Step 6: Position Your Tent to Reduce Heat Loss
Campsite selection changes the effective temperature inside your tent by 5 to 10 degrees. Cold air is heavier than warm air and drains downhill at night, pooling in hollows and low clearings. Pitching your tent on a slight rise, or at the edge of a clearing rather than the center, keeps you out of the coldest zone in the site. Avoid low ground near creeks and meadows where cold air collects and frost hits earliest.
Wind compounds cold dramatically. A tent exposed to even a 10 mph wind at 38 degrees feels significantly colder than a sheltered tent at the same air temperature. Use natural windbreaks: a stand of trees, a boulder, a rise in the ground. Orient the door away from the prevailing wind. If you have a rain fly, pitch it close to the ground rather than staked out wide. The air gap between fly and tent body acts as an insulating layer, and a tight pitch reduces wind-driven convection. Proper rain fly tension also prevents condensation from dripping onto the sleeping bag, which matters as much as the wind block.
What Else Helps
Beyond the six steps, a few smaller items consistently make cold nights easier. A headlamp left on a low-red mode and placed near the top of the bag can provide minimal radiant warmth in a small space (marginal, but not nothing). Eating a small high-fat snack like peanut butter or nuts 30 minutes before bed gives your metabolism something to burn through the night. Keeping your water bottle inside the sleeping bag instead of in the tent pocket prevents it from freezing and gives you a cold-morning-comfort win when it is still liquid at 6 a.m.
If you are shopping for a bag and this is the temperature range you camp in most often, the oaskys bag honest review covers where the insulation actually performs at its 35-degree rating versus where it starts to fall short. And if you want the case for why three-season bags beat summer-only bags for most weekend campers, the three-season versus summer-only comparison walks through 10 specific scenarios.
A 35-degree bag plus these six steps covers most three-season camping in the lower 48.
The oaskys sleeping bag is rated to 35 degrees, weighs 3.3 lbs, and has a two-way zipper with draft tube for easy venting. Over 24,000 reviews, 4.5 stars.
Amazon Check Today's Price on Amazon →