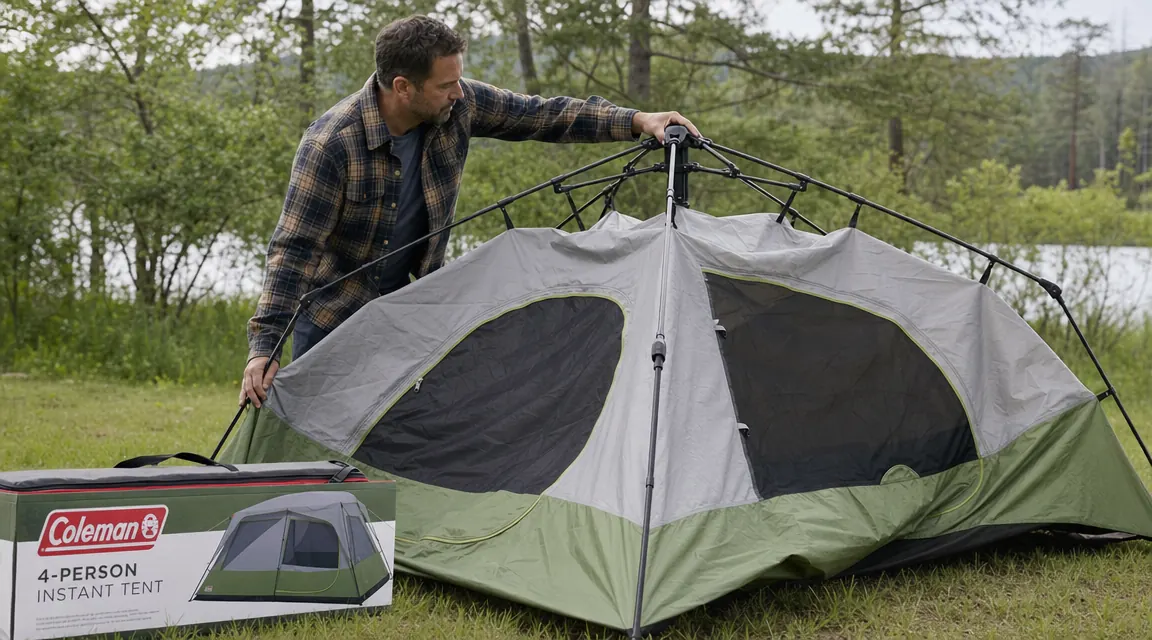
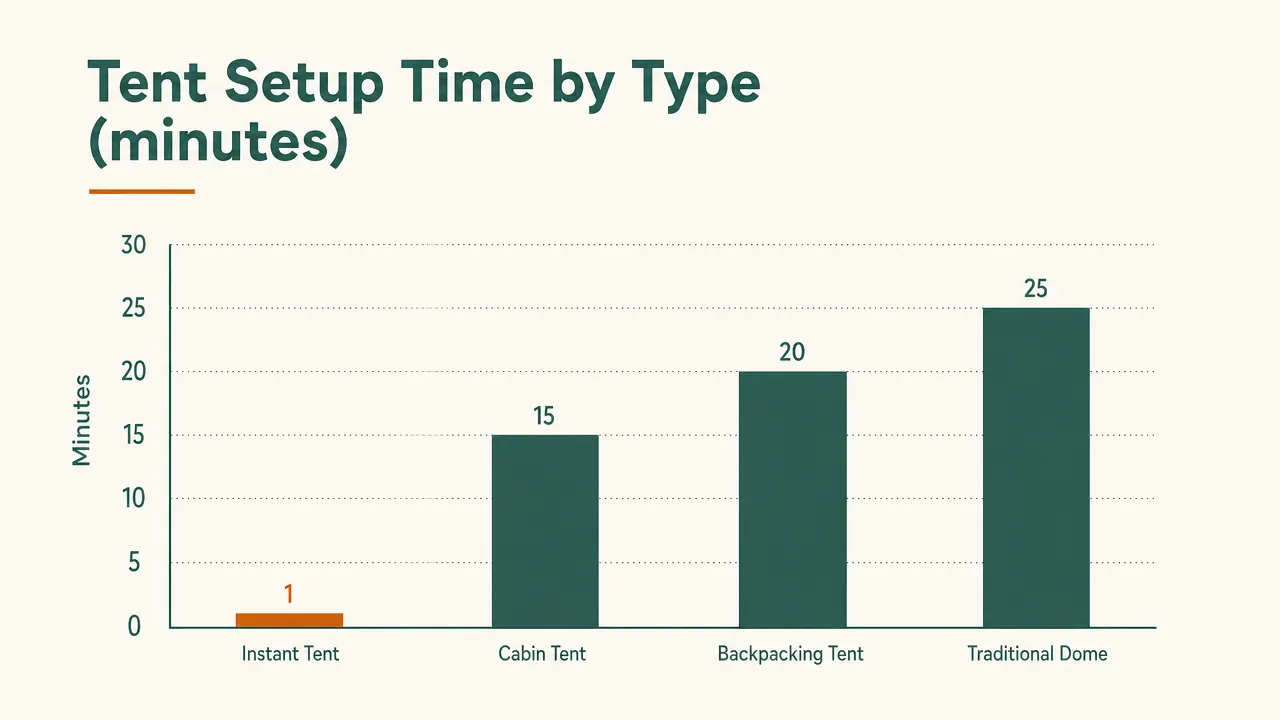
Most family tent setups take 20 minutes because nobody read the instructions before pulling into the campsite at dusk with three kids and a dog. I have done that. Once. After that trip I spent an afternoon in the driveway learning the exact sequence on our Coleman 6-Person Instant Tent, and since then setup runs 90 seconds on flat ground, under two minutes if I am fussing with the rain fly. This guide walks through that exact sequence, the stake pattern that matters when rain rolls in overnight, and the one step almost everyone skips that turns a 90-second job into a 10-minute wrestling match.
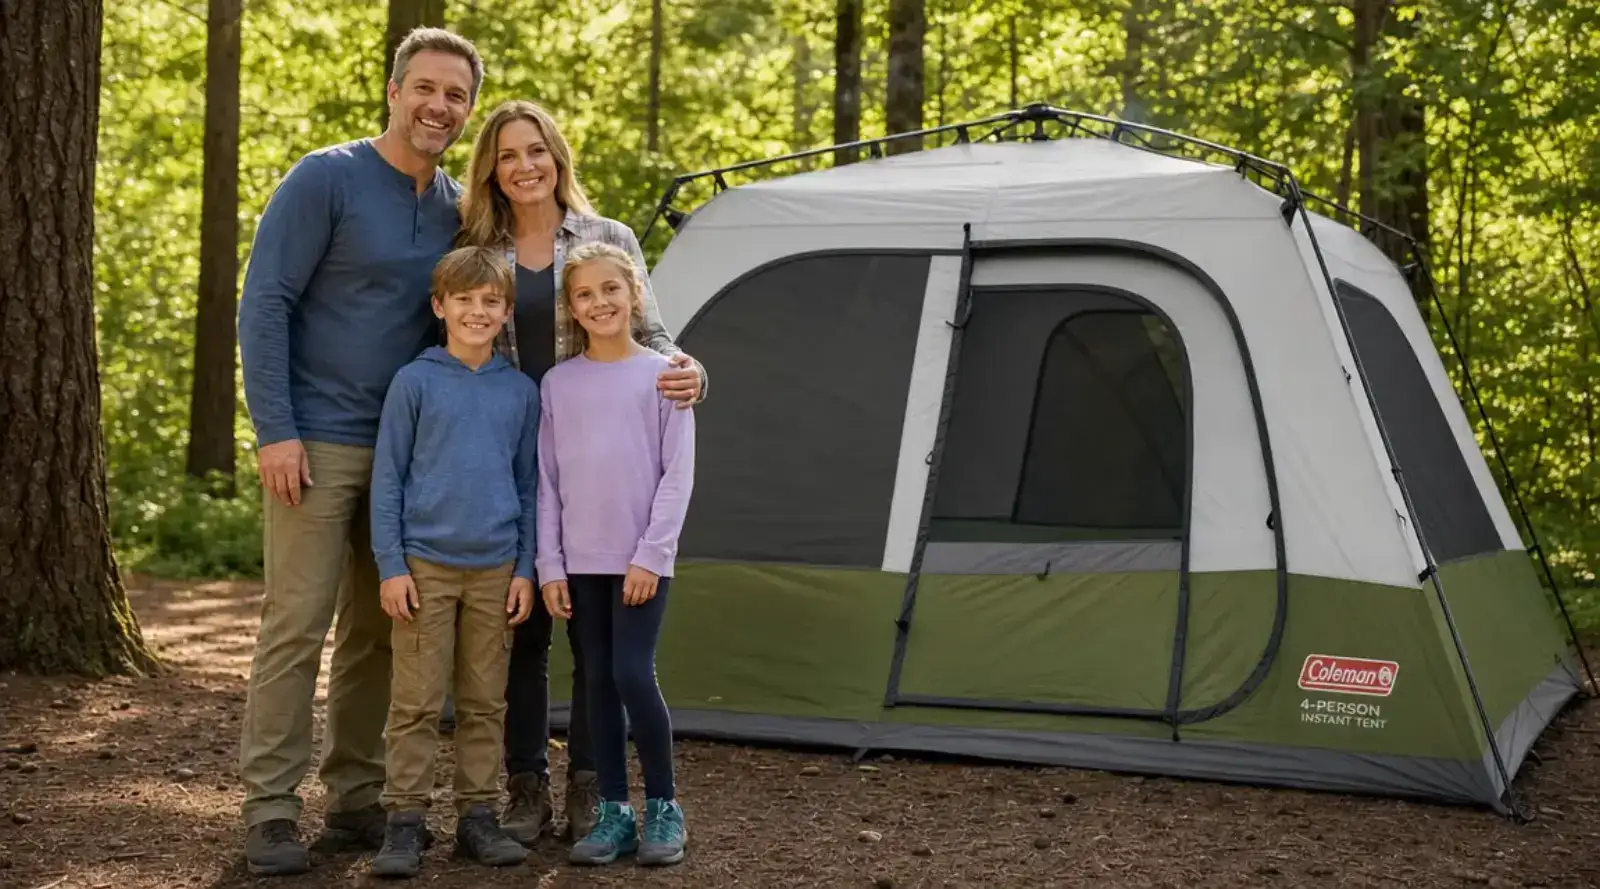
The Coleman Instant Tent (ASIN B0D6NQKDWJ, rated 4.3 stars across 23,866 reviews) works fast because the poles are pre-attached to the tent body at the factory. You do not thread poles through sleeves. You do not clip anything. The frame is already built. Your job is to unfold it in the right order, stake the corners before you extend the legs, and set the roof angle so water sheds correctly. Skip any of those three things and you slow down or, worse, wake up damp at 3am.
Still fighting a pole-sleeve tent every trip? The Coleman Instant Tent sets up before your first cup of coffee.
Pre-attached poles, single-person setup, and a 10x10-foot floor for a family of six. Check today's price on Amazon.
Amazon Check Today's Price on Amazon →Step 1: Pick Your Spot and Orient the Door Before You Unpack
Before the bag unzips, stand at your site and decide which way the door faces. Wind direction matters more than convenience here. If a storm is coming from the west, you want the door on the east side so rain does not drive straight through the vestibule every time someone goes in or out. Once you have the orientation locked, lay the stuff sack flat on the ground in the center of the footprint so the tent unpacks in the correct direction. Takes 15 seconds. Saves you from dragging a fully-extended tent 90 degrees across a rocky site.
Also clear the footprint. One fist-sized rock under a sleeping pad at 2am feels like a cinderblock. Kick away sticks and stones now so you are not rearranging furniture inside the tent tonight. I use the bottom of my boot to sweep the area in a grid pattern. Sixty seconds of work.
Step 2: Unzip the Bag, Spread the Tent Flat, Locate the Center Hub
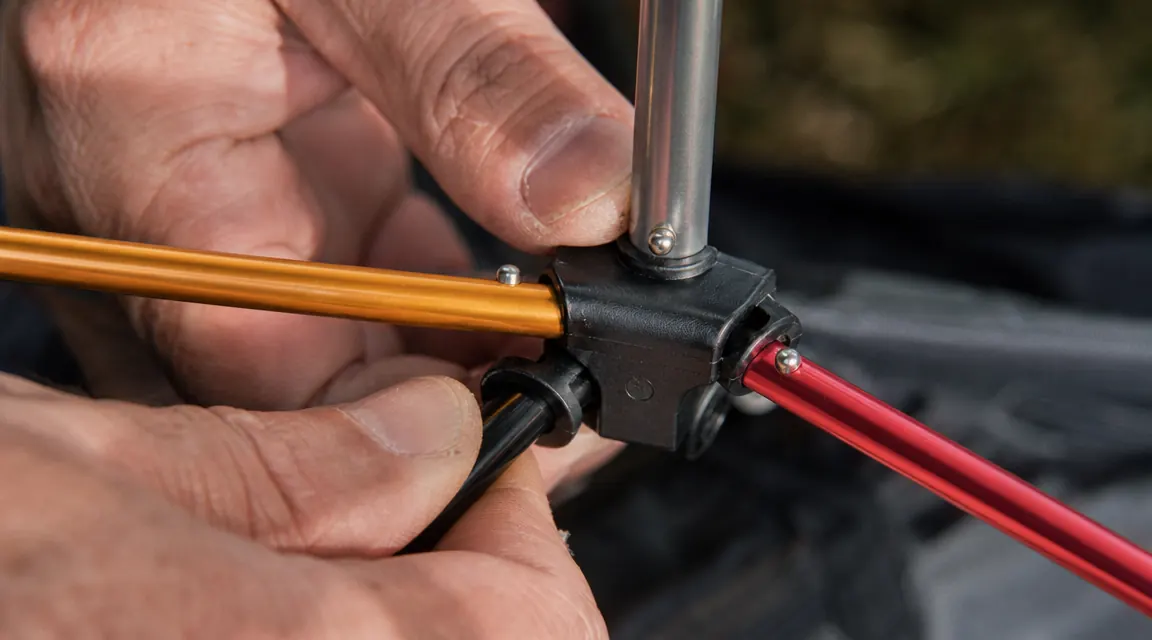
Pull the tent body out and shake it onto the ground in the center of your cleared footprint. The tent will come out in a rough star shape. The center hub is the plastic connector at the apex where all the main poles meet. It is color-coded on newer Coleman models: the hub itself is a slightly different shade from the pole shafts. Find that hub before you do anything else. Every step that follows starts from the hub and works outward.
Lay the tent so the door faces the direction you chose in Step 1. The floor fabric should be underneath, the fly (if attached at the factory) on top. Newer versions of the Coleman Instant Tent ship with the fly unattached, stored in a separate compartment at the bottom of the bag. If yours is a separate fly, leave it folded on top of the stuff sack for now. You will attach it after the frame stands.
Step 3: Stake Two Corners Before You Unfold the Frame
This is the step people skip, and it is the single biggest time-waster on site. If you unfold the frame first and then try to stake corners, the tent walks across the ground every time you push a leg outward. The floor bunches, you chase a corner, the whole frame tilts. Instead, drive two diagonal corner stakes before the frame opens. Pick two opposite corners, front-left and back-right, or front-right and back-left. Drive each stake at a 45-degree angle away from the tent, not straight down. Straight-down stakes pull out under lateral load when a gust hits.
Stake depth matters on soft ground. The stake collar should be flush with the soil surface, not proud by two inches. If your stakes are too short for soft campground soil (the Coleman stakes that ship in the bag are fine for hard-packed sites, marginal on sand or loose loam), carry a set of 9-inch shepherd's hook stakes as backup. That is a separate $10 purchase worth making before a beach or lakeside trip.
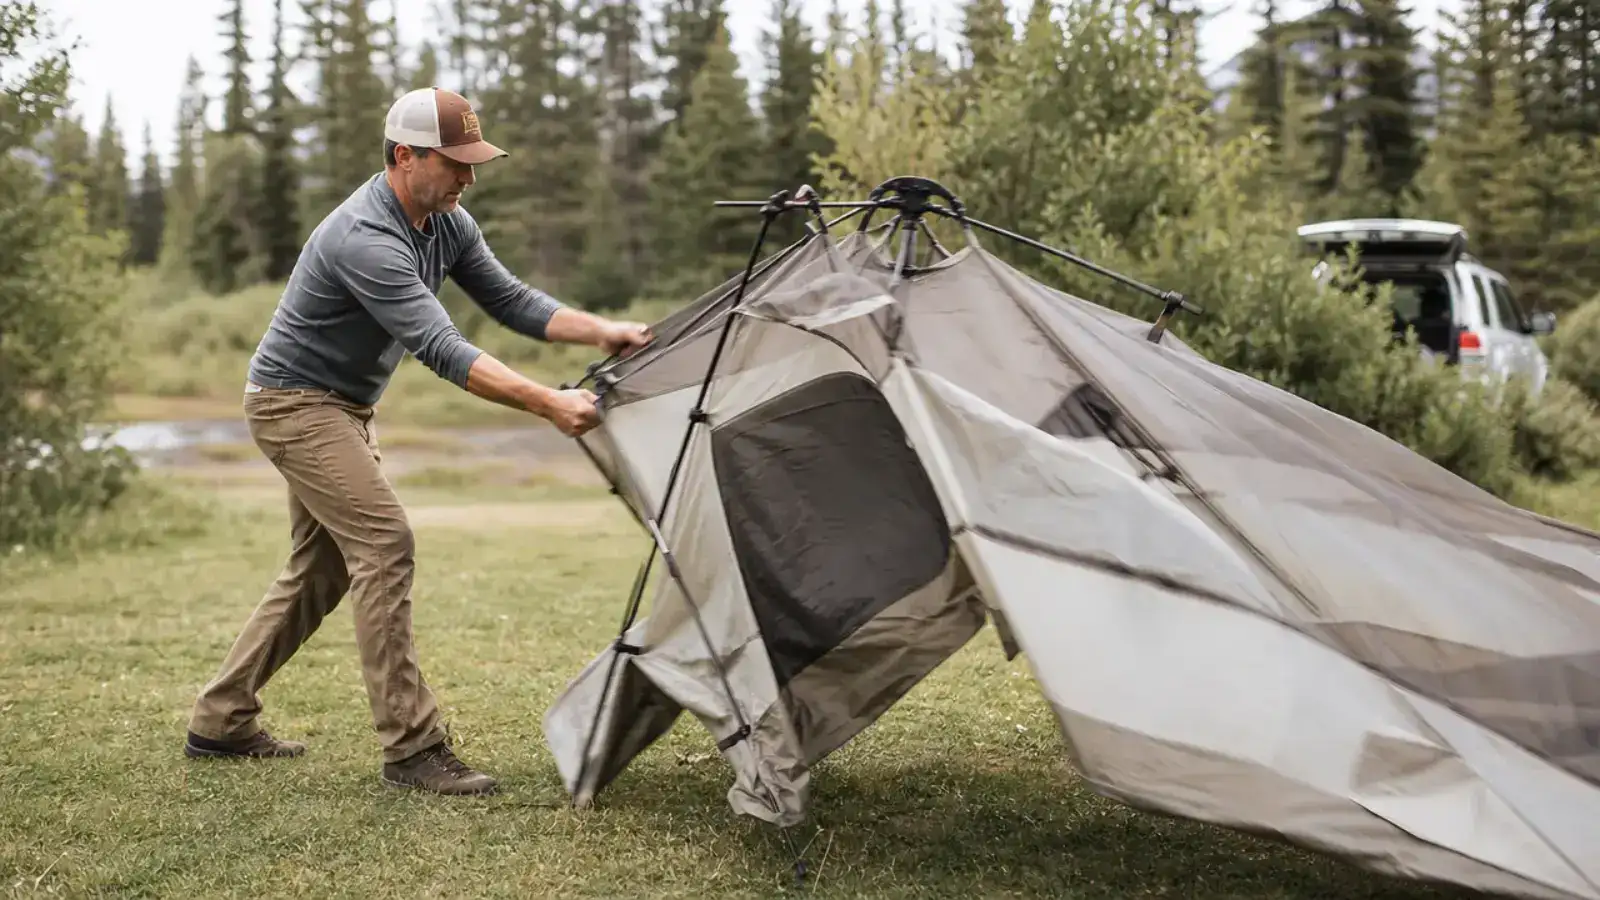
Step 4: Press the Hub Release and Unfold the Legs in Sequence
Stand at the center hub, grip it with both hands, and press the release buttons on the sides. The legs are spring-loaded and will begin to spread outward on their own. Guide them rather than force them. Work in a cross pattern: push one leg out to 45 degrees, then the leg directly opposite, then the other two. Alternating sides keeps the hub centered over your staked corners. If you push all four legs on one side first, the hub walks toward the un-staked corners and you get a lopsided frame.
Once the legs are at roughly 45 degrees, stand up, grab the hub, and push it straight overhead. The legs will lock into their final angle with an audible click on each joint. You should hear six to eight clicks total depending on your model size. If a joint does not click, press down on that corner of the roof and bounce lightly. A missed click means that leg is not fully extended and the tent will sag on that side. On the 6-person model the fully-extended peak height is 6 feet, enough to stand inside without ducking.
Two staked corners before the frame opens. That is the whole trick. Every minute you save pitching a tent is a minute you are sitting in a camp chair instead.
Step 5: Drive the Remaining Six Stakes with the Correct Angle
With the frame standing, drive the remaining six corner and guyline stakes. Keep the 45-degree outward angle on every one. The most common mistake here is the front-door stake: because you are standing at the entrance, it is natural to hammer the stake straight down toward your feet. That stake will pull out in any sustained wind or rain. Angle it away from the tent body like all the others.
Guyline loops are sewn into the seams at the midpoint of each wall on the 6-person model. Thread the included guylines through those loops and stake them out at 45 degrees as well. In calm weather you can skip the guylines. If the forecast shows any chance of wind above 15 mph or rain overnight, run all four guylines. An extra 90 seconds now is worth it against a 3am tent collapse. The Coleman Instant Tent is not a backpacking-grade storm shelter, but guylines tightened correctly will hold through a normal car-camping thunderstorm.
Step 6: Attach and Tension the Rain Fly
If your fly is a separate piece, drape it over the standing frame now. The fly has a center attachment point that clips to the hub, plus four corner loops that hook over the corner feet of the frame. Clip the hub attachment first so the fly sits centered, then work corner to corner. Once all four corners are attached, tighten the tension cords at each corner until the fly fabric is taut with no pooling sections. A baggy fly pools water in the center overnight and the weight of that pooled water can bow the frame by morning.
Check the gap between the tent body and the fly at the walls. You want 2 to 4 inches of airspace on all sides. If the fly is touching the inner wall fabric, condensation from breathing inside the tent will wick straight through to your sleeping bags. Retension the corner cords until you have clearance all the way around. On cold mornings that gap is also what keeps frost from forming on the inner fabric.
What Else Helps
A footprint (ground cloth) cut to the tent floor dimensions adds meaningful waterproofing under the floor seams and protects the floor fabric from abrasion. Coleman makes a footprint for this tent, or you can cut a piece of 6-mil poly sheeting 2 inches smaller than the floor on each side. The smaller cut keeps rain from channeling between the footprint and the floor rather than running off the footprint edge. If the footprint is larger than the floor, it acts as a funnel and you wake up sitting in a puddle.
Seam sealer on the floor seams is worth doing once before the first trip. The Coleman Instant Tent's floor seams come taped from the factory, but tape loosens over time, particularly at the corners. Run a bead of silicone seam sealer along every interior floor seam after the first season. Takes 20 minutes and adds a couple of years to the tent's useful life. Use a sealer rated for polyester fabric, not pure silicone caulk.
If you have not read the full-length reviews yet, both the three-season long-term review and the honest review covering what the box does not tell you go deeper on durability, waterproofing real-world limits, and the condensation tradeoffs that matter on cold nights. And if you are still weighing whether the instant-setup format is worth the price step versus a traditional pole tent, the 10 reasons listicle lays out the case without padding.
The Coleman Instant Tent is standing before most families finish unloading the car.
Pre-attached poles, 10x10-foot floor for six, and a rain fly that mounts in under a minute once you know the sequence. See what it costs today.
Amazon Check Today's Price on Amazon →