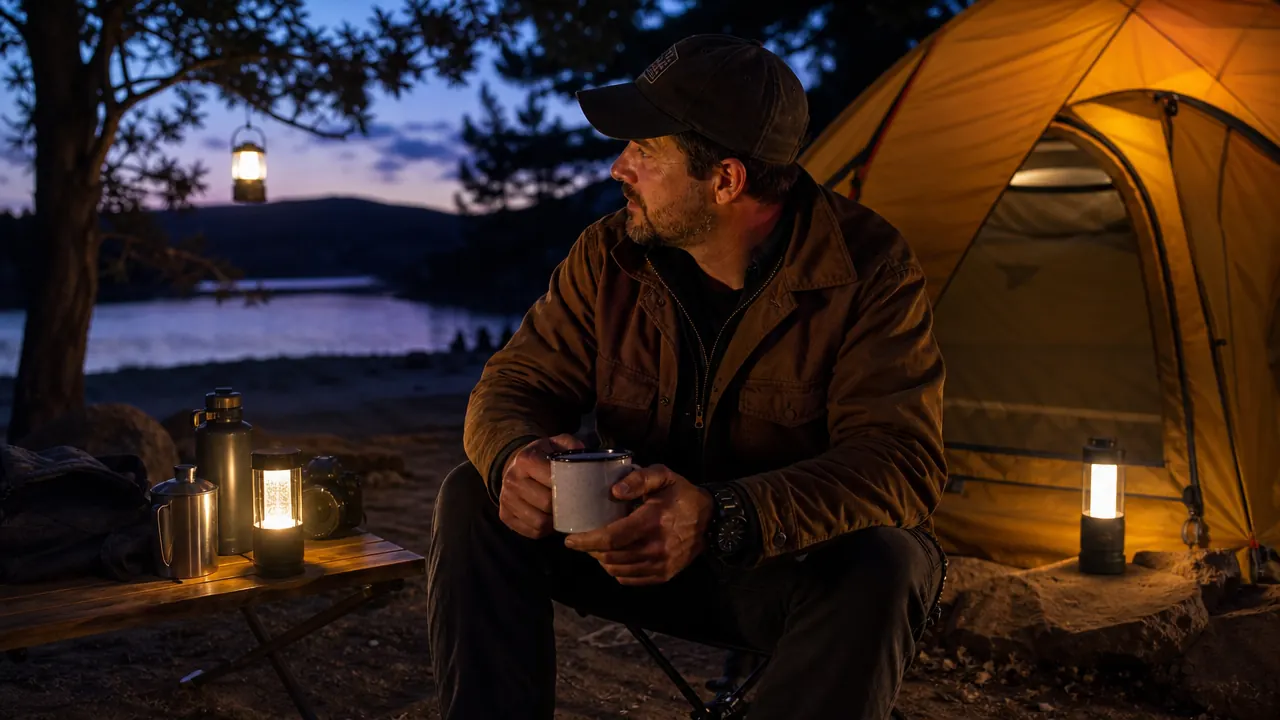
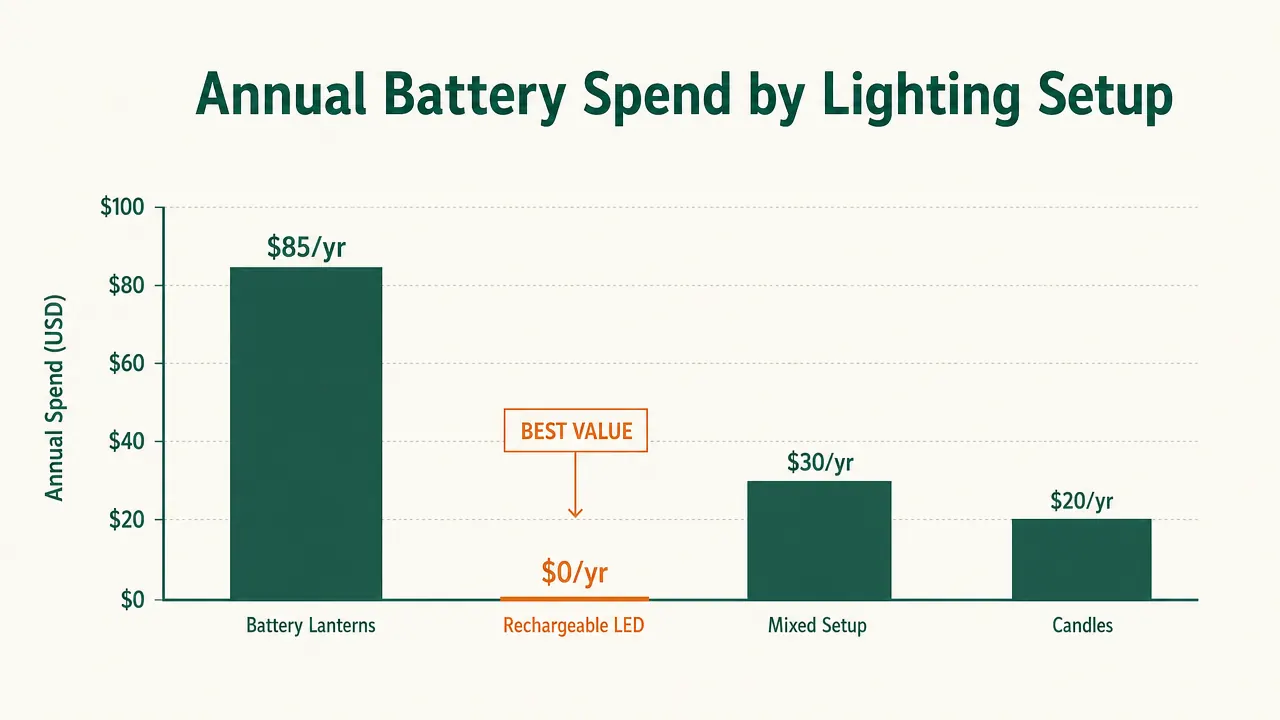
I have been on the trip where the lantern dies at 9pm because somebody forgot to check the batteries before leaving home. Two D-cells left in a four-battery lantern, and you are either reading by headlamp or calling it early. The fix is not packing more spares. The fix is switching to a rechargeable system and building a charging routine that takes three minutes before you load the truck.
This guide covers exactly that: five concrete steps to set up a campsite lighting system that runs on USB-C power banks instead of disposable batteries. The anchor of the setup is the Lepro 1000LM rechargeable camping lantern, a 4400mAh unit that puts out genuine usable light and recharges from the same cable as your phone. I have used it on 11 car camping trips over the past 18 months, in rain and cold, and it has not let me down once.
Stop burning through AA packs. The Lepro charges from any USB-C bank you already own.
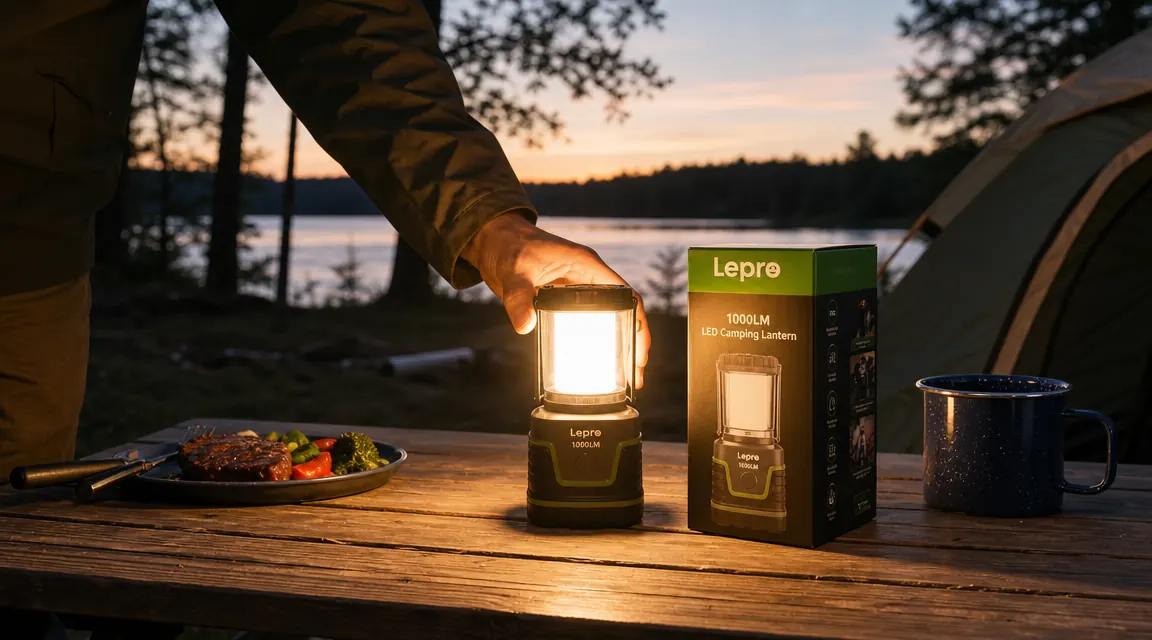
1000 lumens, 4400mAh internal battery, IPX4 waterproof. Rated 4.6 stars by more than 33,000 campers. Charges fully in about 3 hours. Works as a power bank for your phone in a pinch.
Amazon Check Today's Price on Amazon →Step 1: Do the Math on Your Actual Lighting Needs
Before you buy anything, figure out what you actually need to light. Most campsite lighting fails not because the gear is weak but because people try to light everything with one underpowered source and it runs flat trying. Walk through your typical evening: cooking and eating at the table, getting around the site after dark, reading in the tent, and finding the bathroom at 2am. Those are four different lighting jobs with different lumen requirements.
The table zone during cooking and dinner needs the most: 500 to 1000 lumens at two to three feet above the surface. The tent zone for reading needs 100 to 200 lumens, diffused. Perimeter navigation needs almost nothing, 20 to 50 lumens is enough to see the ground. Once you know your zones, you know whether one lantern covers it or whether you need a secondary light for the tent. For a two- to four-person weekend car camping trip, one Lepro set to its 500LM medium mode at the table plus its 200LM low mode inside the tent handles both jobs on a single charge across two nights.
Write down the number of nights per trip and your honest usage hours per night. A typical evening is four hours of active site use (6pm to 10pm) plus one to two hours of tent reading. Six hours total. The Lepro's 4400mAh battery runs 8 to 9 hours at medium brightness and 12-plus hours at low. That math means a single full charge gets you through a two-night trip without touching a power bank.
Step 2: Choose Your Primary Lantern and Verify Its Charging Port
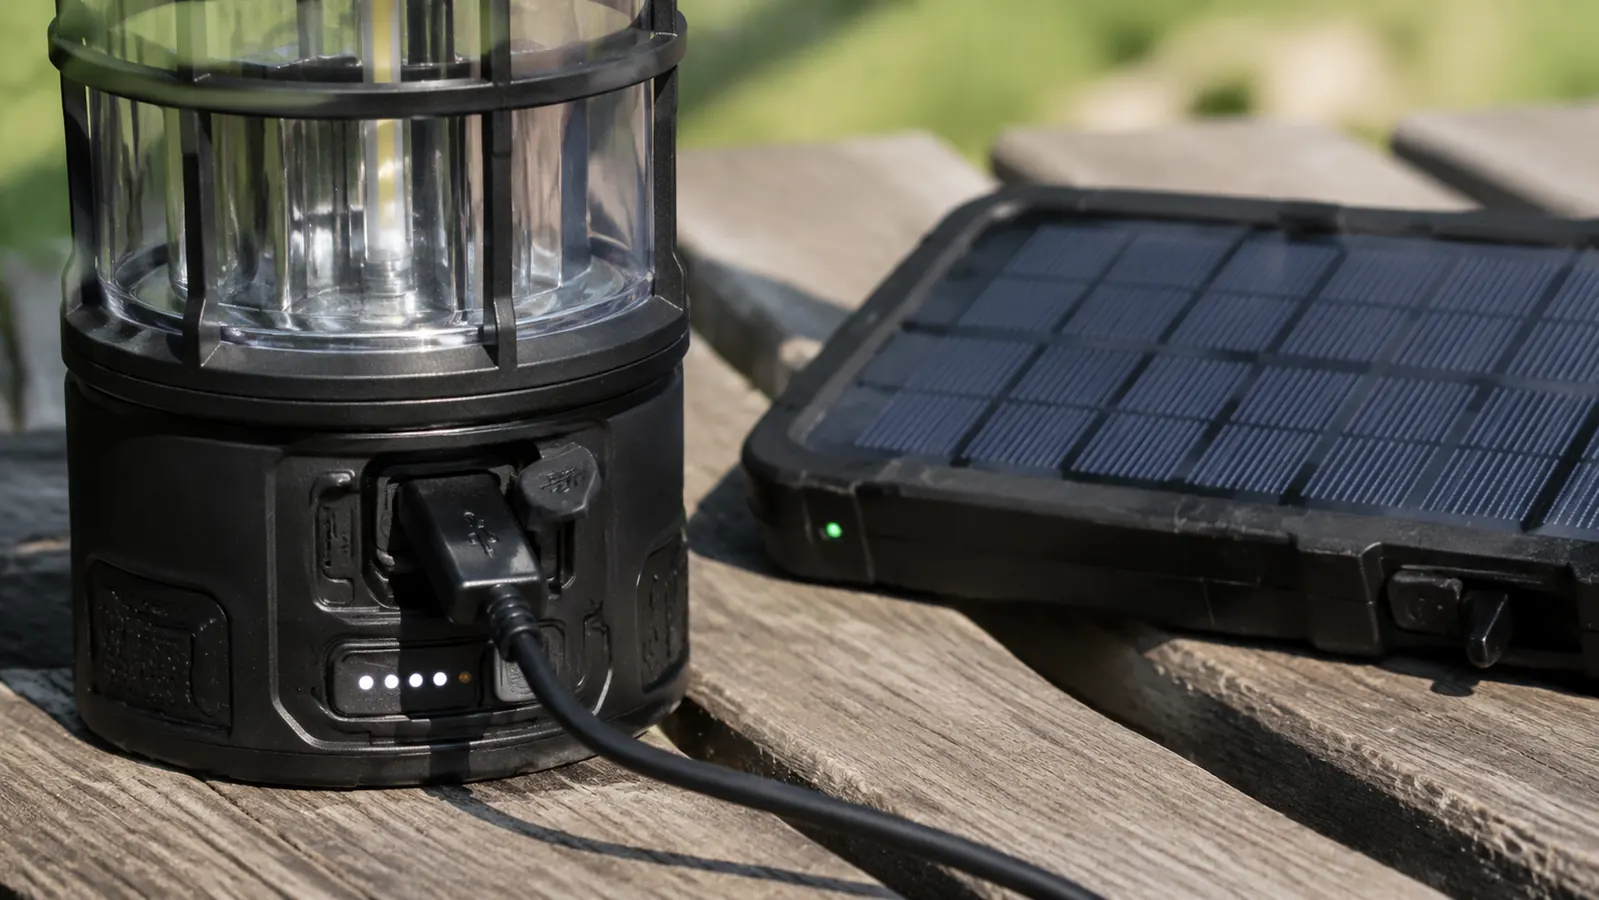
Not all rechargeable lanterns are created equal on the charging side. Some older models still use micro-USB or a proprietary wall-wart brick. That kills the whole point of a cable-unified kit. What you want is USB-C, ideally with 5V/2A input so it charges from any modern power bank at reasonable speed. The Lepro LED camping lantern uses USB-C on the base. That matters because you are already carrying USB-C for your phone. One cable type, one charger block, one power bank. Fewer failure points.
Check the lumen spec against what the brand actually delivers at your usage mode, not just the peak number. The Lepro advertises 1000LM at full brightness, which is real and useful for a large table, but the medium mode at roughly 500LM is the one you will use most evenings. At that setting the runtime is about 8 hours. The dim mode (around 100LM) is the reading-in-the-tent setting, and that gets you 12-plus hours. Knowing which mode matches which job keeps you from flattening the battery trying to run full-bright all night.
Six hours of real campsite use, two nights in a row. The Lepro handled it without touching the power bank once. That was not what I expected from a thirty-dollar light.
Step 3: Build Your Power Bank Stack
The Lepro holds 4400mAh internally. A full charge from a dead battery pulls roughly 5.5 to 6Wh of actual capacity from a bank (accounting for conversion losses). A 20,000mAh power bank at 3.7V nominal carries about 74Wh. That means one 20,000mAh bank can fully recharge the Lepro three times over, plus keep your phone topped up for four to five days. For a weekend trip, one bank is enough. For five days, bring two.
Pick a bank with at least one USB-C port that outputs 18W or higher. Lower output ports will charge the lantern, just slowly. At 10W input the Lepro takes about three hours to go from flat to full. At 18W it gets there in just under two hours. Run the numbers for your trip: charge the lantern fully the night before you leave, bring the bank full, and plan one top-up charge at the midpoint of a multi-day trip. That is the whole maintenance routine.
One thing worth noting: the Lepro can also output 1A from its USB-A port, which means the lantern itself can charge your phone if the bank runs out. It is not fast charging, but it is a real backup. On one trip I came back to camp with my phone at 8% and the Lepro sitting at half charge. Plugged in for 45 minutes and got to 40%. Not the primary use case, but good to know it works.
Step 4: Place Your Lights Before Dark
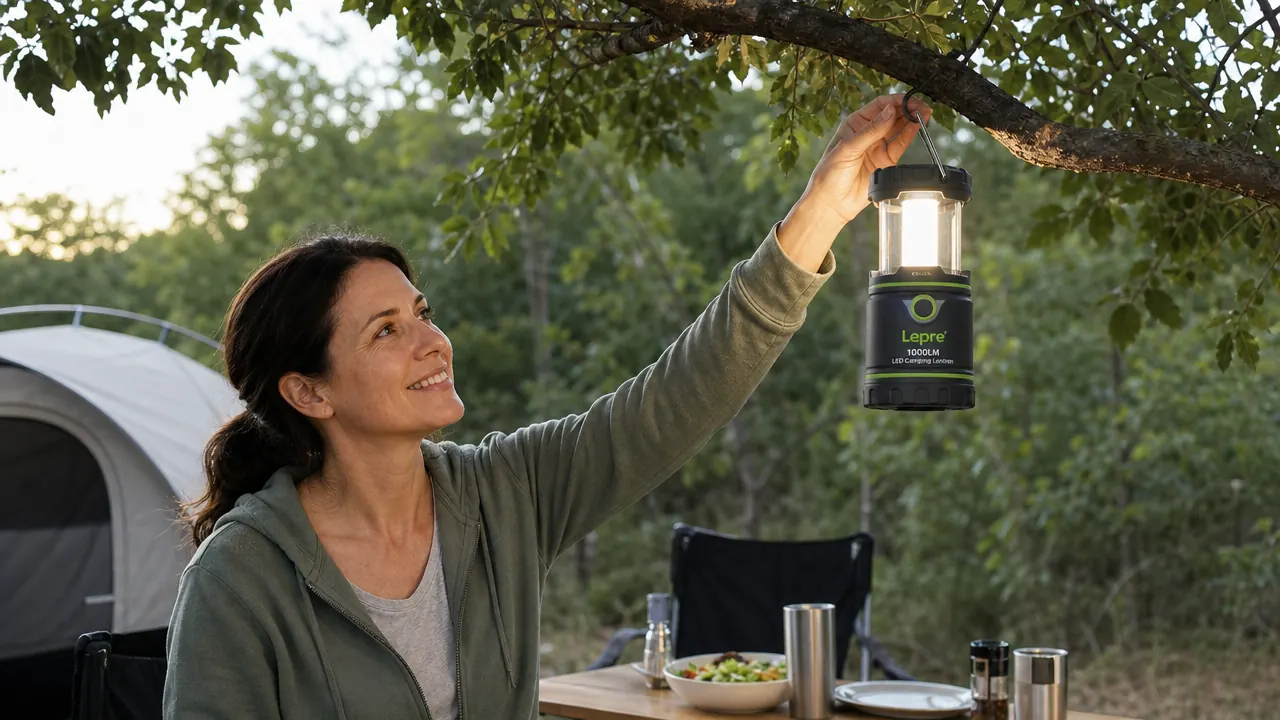
Light placement is where most camp setups go wrong. People pull out the lantern at dusk, set it flat on the picnic table, and wonder why half the site is shadowed and the light is shining into their eyes instead of onto the surface they are working on. Height and angle matter a lot with a 360-degree LED lantern.
For the table zone, hang the lantern from the center of the overhead structure or clip it to a paracord line strung between two trees at about seven feet. That puts 500LM overhead and washes the whole table evenly without the glare. If you are stuck with table placement, elevate it on a small stand or an upturned cup so it sits at least 18 inches above the surface. The Lepro has a hook at the top that works with a carabiner, an S-hook, or a lanyard. I run a 12-foot section of 550 cord between two picnic table legs at a diagonal and clip the lantern there as a center drop.
For the tent, the Lepro collapses to a compact cylinder and the top hook fits standard tent ceiling loops. Set it to the 200LM or low mode inside. Full bright inside a tent is uncomfortably harsh and burns through charge faster than you need. Low mode gives soft diffuse light that is easy to read under and does not wreck your eyes when you look up. The full review of the Lepro lantern covers the tent placement in more detail, including which tent loop types hold the weight reliably.
Step 5: Charge Before You Pack, Not When You Arrive
This is the discipline step and it is the only one that requires habit rather than gear. A rechargeable lighting system is only maintenance-free if you actually charge it before each trip. The failure mode I have seen three times at campsites: someone bought a rechargeable lantern, used it once, and then grabbed it off the shelf eight months later without checking the charge. They showed up with 12% battery. That is a battery-powered lantern problem wearing rechargeable clothes.
Build a pre-trip checklist and put the lantern on it. Plug in the Lepro two nights before you leave. It takes two to three hours to go from flat to full. Check the indicator light on the base: four blue LEDs means full charge, fewer means it needs more time. Do the same for your power bank. On a four-day trip I also top up the lantern on night two from the bank while everyone is eating dinner. That takes about 30 minutes from 50% and means I go into the back half of the trip with a fresh charge rather than rationing modes.
Cold weather speeds up discharge slightly. At 35 to 40 degrees Fahrenheit I lose about 10 to 15% more capacity than I would at 65 degrees. Not dramatic, but worth knowing for fall shoulder-season trips. If you are camping in October or November, add that buffer to your math and plan one extra top-up session. The case for rechargeable over battery-powered gets stronger in cold weather because alkaline batteries shed capacity even faster in the cold.
What Else Helps
A headlamp is not a substitute for a lantern but it fills real gaps. Bathroom runs at 2am, cooking prep where you need hands free, and finding gear in the car all call for a headlamp rather than carrying the lantern around. Keep a headlamp in the tent and the lantern at the table. Two separate jobs, two separate tools.
String lights running off USB power add a nice ambient layer if you want the site to feel like a place rather than a work zone. A 10-meter USB string light pulls about 2.5 to 3W and runs fine from a phone charging port or a spare USB-A bank. The honest review of the Lepro notes that the lantern's USB-A output can technically run a low-draw string light while the lantern itself is providing primary illumination. I have done it. It works, though it cuts into the lantern's runtime.
Reflective surfaces help more than people realize. A white tablecloth, a light-colored tarp overhead, or even a white plastic cutting board propped up behind the lantern will bounce light and nearly double the effective illumination radius without adding any wattage. It sounds like a minor optimization but it is meaningful when you are trying to keep the lantern on medium mode to preserve battery.
The Lepro has a 4400mAh battery, charges via USB-C, and lasts two nights per charge at real brightness.
1000 lumens peak, four light modes including a low battery-saver mode, IPX4 waterproof rating, and a built-in hook for overhead hang. Backed by a 4.6-star rating from 33,000-plus buyers. This is the lantern to anchor a rechargeable campsite lighting setup.
Amazon Check Today's Price on Amazon →